Featured in PSA Journal - March 2026 - Click to Read
〰️
Featured in PSA Journal - March 2026 - Click to Read 〰️
Jingru Luo Speaks in Shanghai, China, May 5, 2026, Click to Read
〰️
Jingru Luo Speaks in Shanghai, China, May 5, 2026, Click to Read 〰️
Sharpen Your Wildlife Edits: Mastering Canon DPP

“POLAR CUBS FEEDING”
PSA GOLD AWARD — PSA Annual Nature Print 2025
Capturing Wildlife: Mastering Burst Mode and Post-Processing with the Canon R5
Chasing a cheetah’s sprint or an albatross’s soar, I’ve learned that the right camera settings can make or break a wildlife shot. Here’s how I use the Canon R5’s burst mode and Canon DPP software to capture and refine stunning wildlife images. Here’s how I use these tools to elevate my wildlife photography.
In the Field: Burst Mode and Shutter Choices
For fast-moving animals like cheetahs or birds in flight, I rely on burst mode, which delivers 12 frames per second (fps) with the manual shutter or 20 fps with the electronic shutter. The electronic shutter’s speed is ideal for rapid action, and its silent operation avoids startling wildlife in places like the Maasai Mara. However, banding (unwanted lines caused by flickering lights or fast motion) can be an issue with electronic shutters. I accept this risk for high-speed subjects but switch to manual shutter for slower animals like Antarctic penguins or seals, which are less disturbed by the camera’s click. In low-light conditions, such as misty Antarctic skies while photographing seals, the mechanical shutter ensures cleaner images with fewer artifacts.
Post-Processing with Canon DPP
After a shoot, I review hundreds of images using Canon Digital Photo Professional (DPP), the free software included with Canon cameras. For Canon users, DPP stands out as the best option for post-processing due to its seamless integration with Canon’s RAW files and its unique ability to display active autofocus points during editing. Here’s my workflow:
1. Quick Scroll: I scan thumbnails in DPP to spot eye-catching shots.
2. Preview and Zoom: I select from a sequence, zoom to 50–200% to check sharpness, and crop to enhance composition.
3. Focus Points: DPP’s preview tab displays active autofocus points overlaid on the image, allowing me to confirm focus accuracy while making edits. This feature, a key advantage for Canon users, is unmatched by most other software, as alternatives like Adobe Lightroom or DxO PhotoLab lack native focus point display during editing.
4. Highlight/Shadow Adjustments: I enable highlight (red) and shadow (yellow) warnings, then adjust brightness to balance exposure.
Shooting in RAW is essential, as it retains more tonal data, reducing banding and enabling lighter, more flexible edits. I also expose to the right (slightly overexposing) to capture maximum detail, which I refine in DPP’s intuitive interface.
In my image “Polar Cubs Feeding,” the electronic shutter captured rapid movement, and DPP’s tools balanced the snow’s brightness for a sharp, vibrant final shot. The ability to verify focus points on the mother’s face during editing ensured the image’s clarity.
Why Canon DPP Excels for Canon Users
While other software like Adobe Lightroom or Capture One offers powerful editing tools, DPP’s integration with Canon’s proprietary RAW format (CR2/CR3) and its focus point display make it the top choice for Canon photographers. Capture One provides limited focus point support in tethered scenarios, but DPP’s seamless, non-tethered workflow is unmatched for reviewing and editing wildlife shots in one interface.
Whether tracking gazelles or polar bears, the Canon R5’s burst mode and DPP software are powerful combination for wildlife photography. Experiment with shutter modes and DPP’s RAW editing tools to elevate your images. Click here to share your tips!
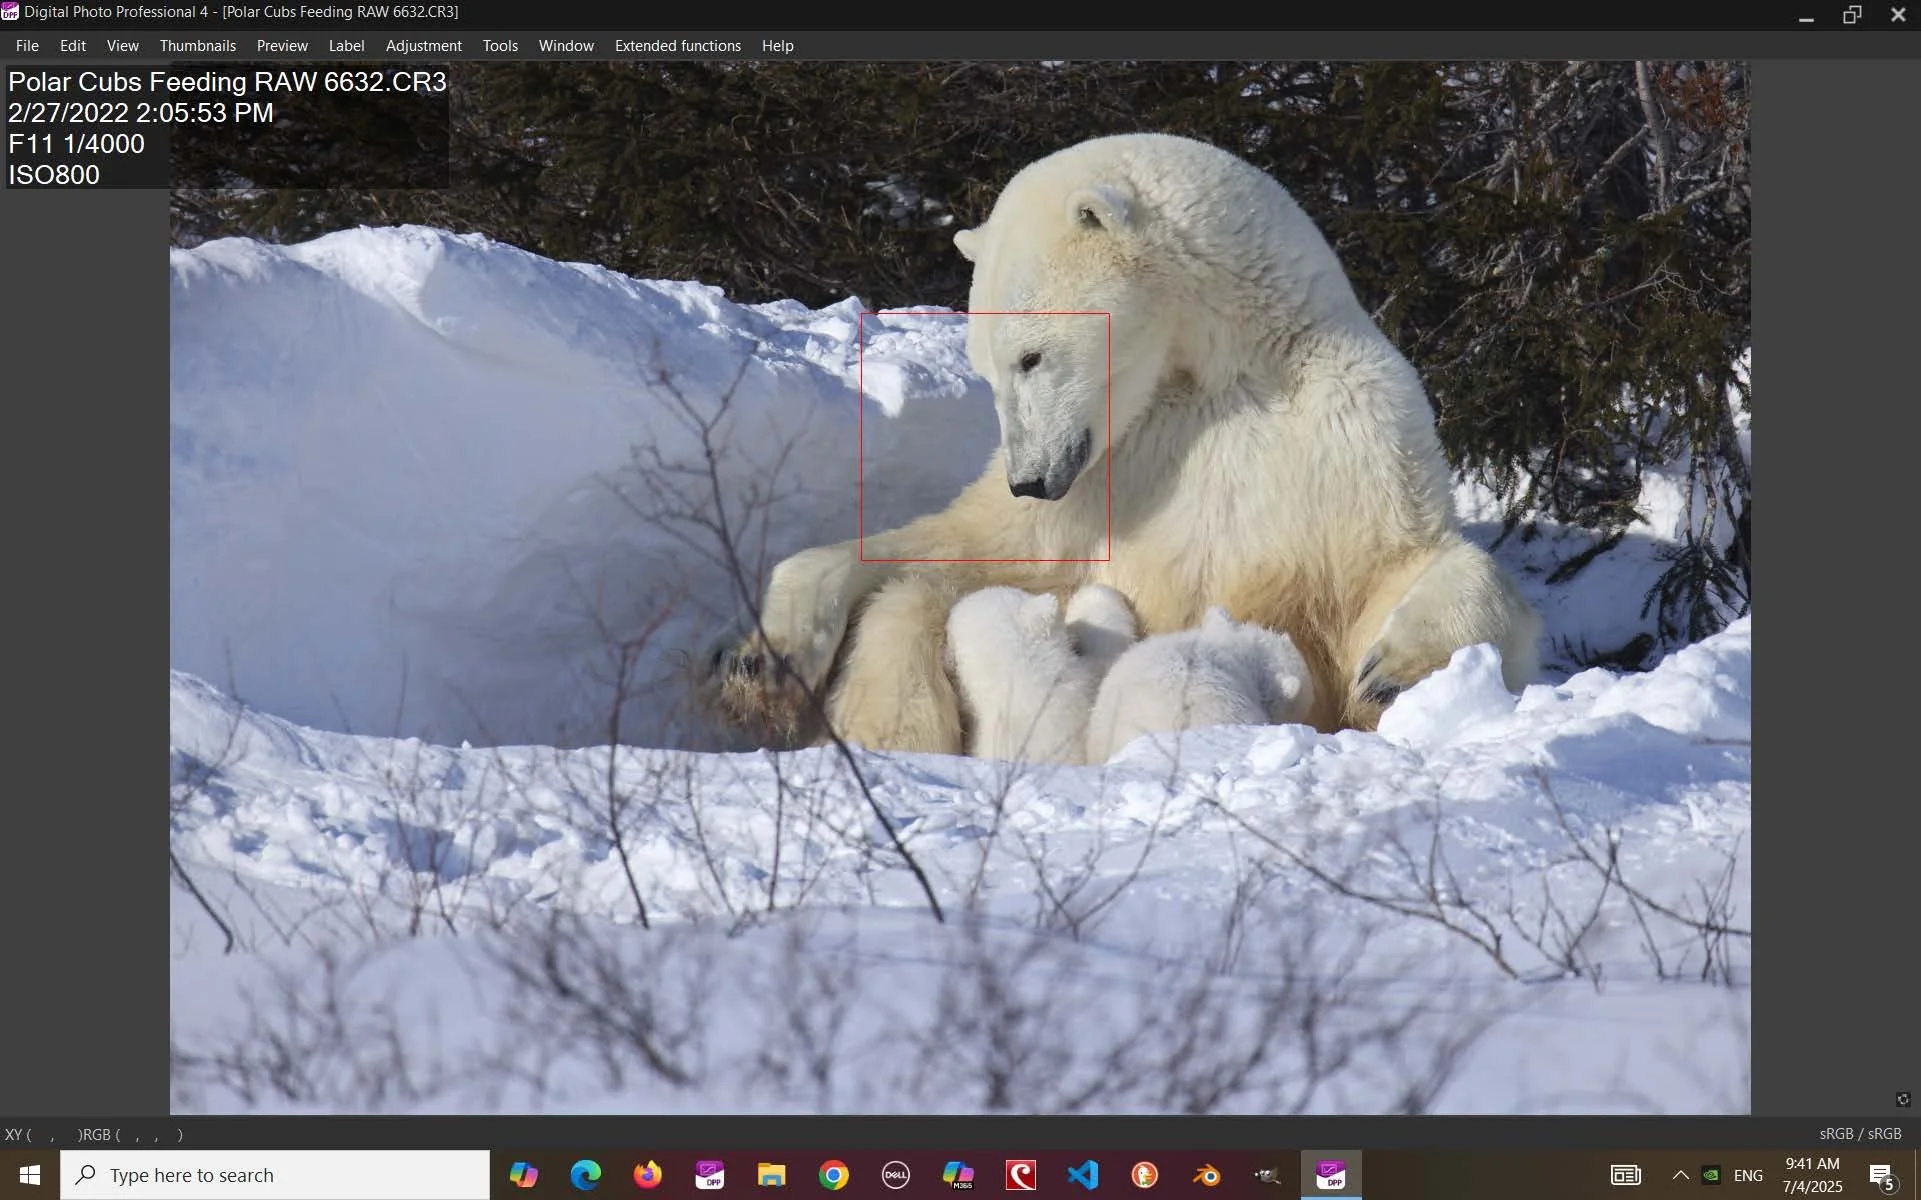
This is the original uncropped RAW file as viewed through Canon Digital Photo Professional software. Notice the focus point is on the mother’s face.